Team User Overview
As GhostVolt is built for collaborative teamwork you can have any number of users in your GhostVolt team. Each user can be assigned default or custom permissions relating to all their actions in GhostVolt and have access to certain folders of your choice. All user actions are also recorded permanently and reports can be generated on every data point. Other users can also control other team members depending on their level of privileges.
The Team window
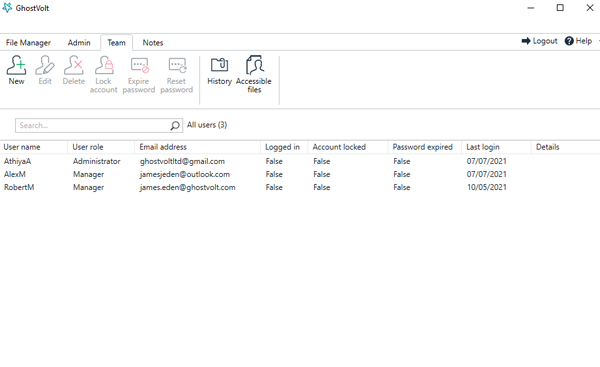
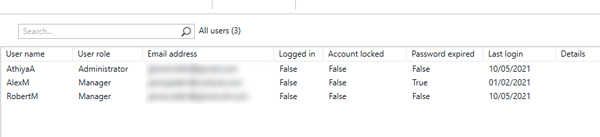
The Team window shows a list of all other users in GhostVolt with important information in the Team view panel columns. Most tasks relating to your team can be accessed by the buttons on the main ribbon or by right-clicking on a team member.
Some other controls relating to your team can be accessed in the Admin window and other reporting features can be accessed in other windows like File Manager. But, don't worry, all team related controls are either discussed in detail or referenced on this page.
Team snapshot
As you can see in the screenshot, a few users have been created – Athiya, with a role of ‘Administrator’, Alex and Robert. Athiya’s email address is listed, and as you can see, she’s not currently logged in, her account is not locked, and her password will expire (in a duration set by the Team Manager).
Assigning Users
New user window
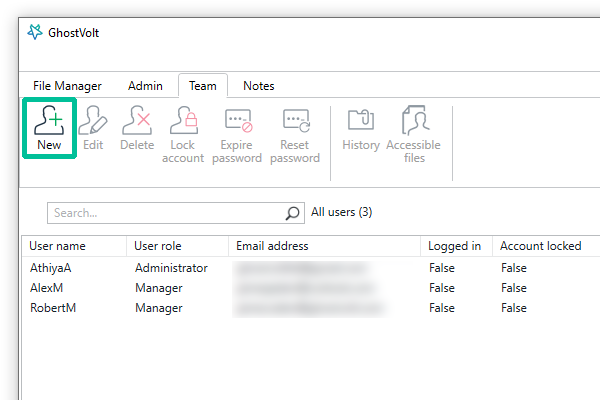
To add a new user, in the Team window, click New in the main ribbon.
This will launch the New User window. This is where you will add your new user's details, assign a login password, setup their permissions and access rights and invite them to your GhostVolt Team either by email or any other method you wish, which we will look at later. Let's take a look at each step...
Account

User name
Enter a descriptive name for your user. It may be their first name, full name or anything you choose, but it must be unique as this will avoid duplicate usernames and will help you identify them in your GhostVolt audit reports. The User name cannot be changed once it is saved.
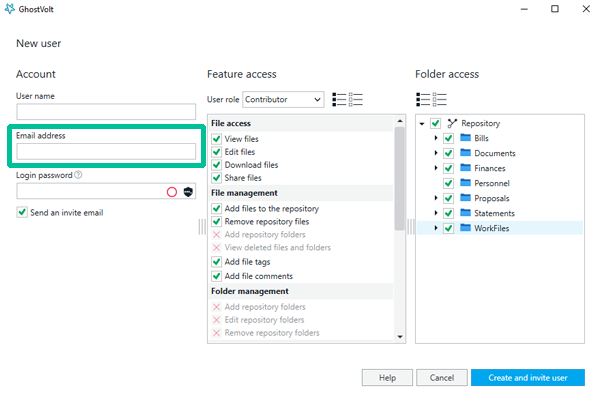
Email address
Your user will receive all GhostVolt notifications with this address. And it is not used as a unique identifier so it can be changed later if necessary.
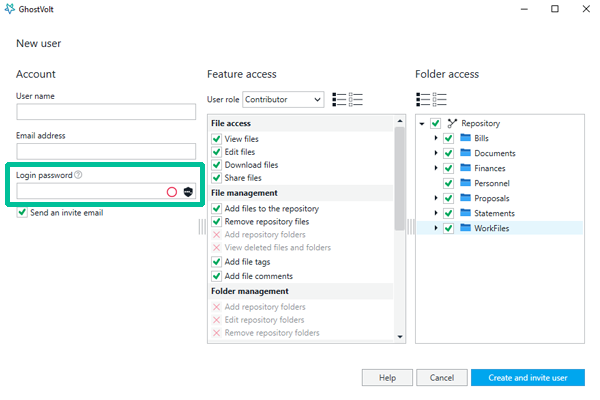
Login Password
GhostVolt will automatically generate a very strong password for each user you create. This will give them means to access your GhostVolt Team. You can leave this as it is or change it if you wish, but it must be secure.
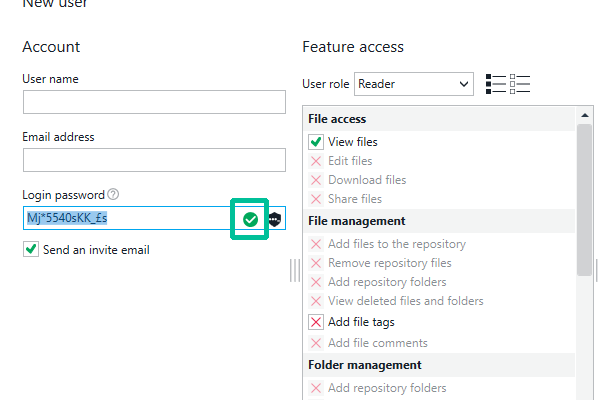
Changing the Password
If you choose to change the user Login Password the password strength indicator will tell you how secure it is. This feature automatically checks a database of known common passwords and passwords that are a high security risk and displays an indication of how strong your entry is. There are five levels from weak to strong (green tick mark). A red cross would indicate a very poor password and will not let you proceed.
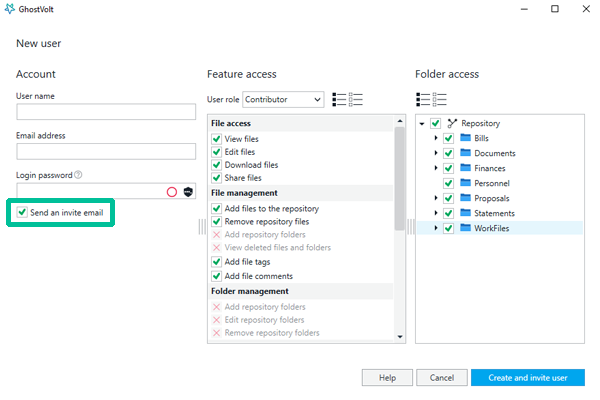
Send invite
Leaving the Send an invite email box checked is recommended; your new user will receive their invite and be prompted to login and change their password to their own. GhostVolt will also give them the option to automatically generate a strong password, just like we can here.
Feature access
The Feature Access panel lets you customise the specific privileges you grant to your user within GhostVolt.
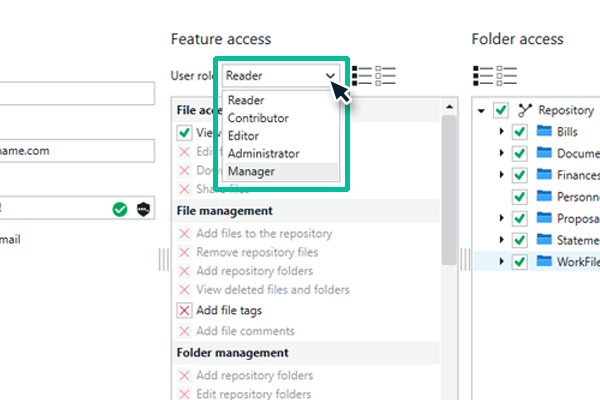
User role
GhostVolt allows you to create and customise the level of privileges your user has relating to every part of GhostVolt and the data you have stored within it. The User Role offers pre-set parameters to start with: Reader, Contributor, Editor, Administrator and Manager. The Manager role would have access to everything by default with Contributor having the least access.
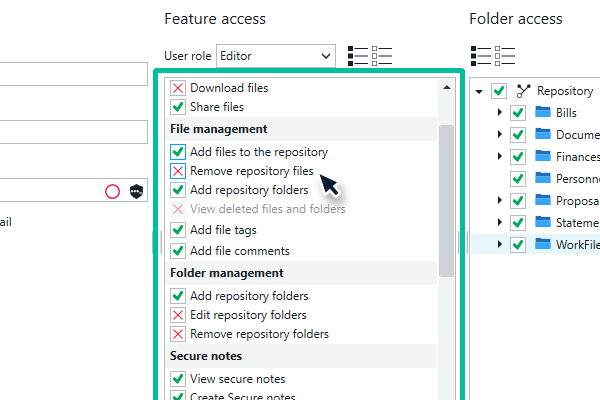
Custom user access
Once you set the User Role in the dropdown menu above, each option will set predefined access to items in the Feature Access panel. This is indicated by the checkboxes to the left of each item.
You can customize the user's role by denying access to items simply by unckecking the box to the left. You can only deny access to certain items in the current User Role setting, you cannot grant access to items above the scope of that role, i.e. if you want the user to have access to more items simply choose a higher User Role in the dropdown menu above and continue to customize as you wish.
Folder access
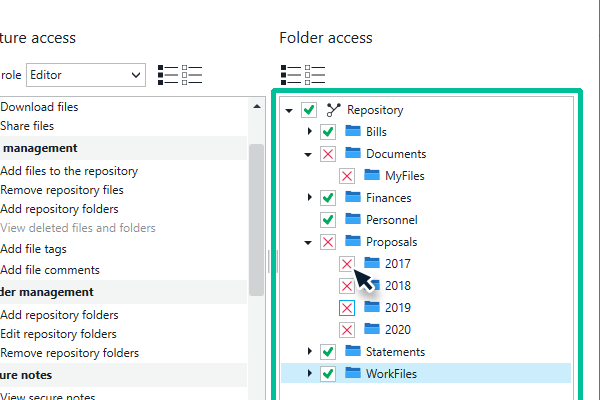
Folder Access is where you grant the user access to folders in your GhostVolt repository. This panel provides a full view of all the current folders you have secured in GhostVolt. Grant or deny access to each of them simply by checking or unchecking the boxes to the left of each folder, or use the shortcut buttons in the top toolbar to check all or none with one click.
Note: Your user can only interact with the folders under the conditions you set in the Feature Access panel. These conditions will apply to all folders/assets in the GhostVolt repository and your user cannot have different Feature Access permissions for different folders.
View User Folder and File Access
Accessible files
You can quickly view all folders and the files a user has access to with the Accessible files feature. This is primarily a Reporting feature and is discussed in more detail in the Reports page.
Select a user and click Accessible files in the main ribbon or right-click a user and select Accessible files. Here you can see a breakdown of all assets the user has access to.
Editing, Deleting and Locking User Accounts
Edit a user
Select a user and click Edit in the main ribbon, or right-click a user and choose Edit.
The Edit User window provides access to Feature Access and Folder Access rights, just as we did in seeting up a new user. These options can be changed at any time and effective the next time your user logs in. You can also change the user's email address here and see that it's verified, inticated by a green check icon.
Delete a user
Select a user and click Delete in the main ribbon, or right-click a user and choose Delete.
Deleting a user account is final and cannot be recovered. Though deleting is a two step process and you will be asked to confirm by entering your own login password to make sure you want to proceed. You can then click Delete to proceed or Cancel to abort the process.
Note: Deleting a user account will delete all data and audit trails related to it, so you will no longer be able to run reports on this account or any actions related to it.
Lock a user account
Select a user and click Lock account in the main ribbon, or right-click a user and choose Lock account.
This feature will lock the user out of their account, they will not be able to login or access any part of GhostVolt. You can revert the operation by selecting Unlock account again.
If a user is Locked their details are highlighted in red in the users list.
User Password Management
Expire a user password
Select a user and click Expire password in the main ribbon, or right-click a user and choose Expire password.
Expiring a user password will just invalidate their current password and force them to change/create a new one next time they attempt to login to GhostVolt.
Reset a user password
Select a user and click Reset password in the main ribbon, or right-click a user and choose Reset password.
The Reset Password function will allow you to create a temporary password for the user that will expire in 24 hours. The user will then be prompted to change it/create a new password next time they login to GhostVolt.
In the Reset Password window enter your own login password to proceed, then create the new temporary password. We also recommend keeping the Email new password to [user email address] box checked so they recieve their temporary password right away.
If the user does not take action within 24 hours you can just repeat this process again at any time.
Global User Settings
Admin/Settings
Some common user controls can be specified in the Settings panel of the Admin window. These settings effect all GhostVolt users regardless of User Role or permissions. Also, the functions discussed here are only available to Managers (the User Role with the highest administrative privileges).
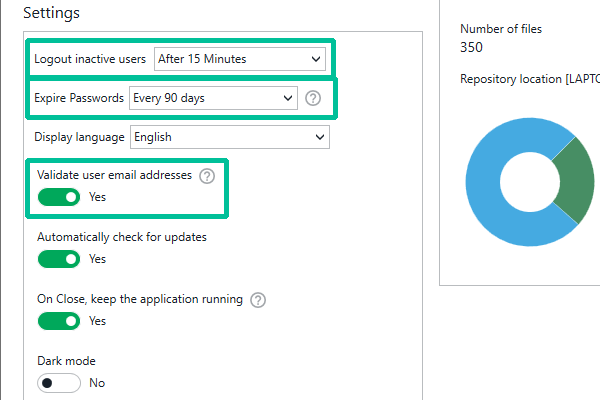
Logout inactive users
To aid security and privacy users will be logged out after the time of inactivity you specify here.
Expire Passwords
Automatically invalidate passwords after a set period of time.
Validate user email addresses
Require new users to validate their account by email. This is needed for password recovery and resets.
User Reporting
Detailed reports can be generated for all user actions and associated files and folders. This is covered in detail in the Team User Reports section of the Reports page.